Concrete walkways or sidewalks are more than just a way to get wherever it is you're going—they can provide much-needed curb appeal to homes and buildings, and they are fast becoming a point of artistic expression by way of a multitude of decorative concrete options.
While plain gray concrete is still the most often surface installed, as seen on most concrete sidewalks, there are numerous decorative concrete alternatives sure to dress it up If you understand the simple basics of mold making you are only limited to your imagination as to the type of walkway designs you can create.
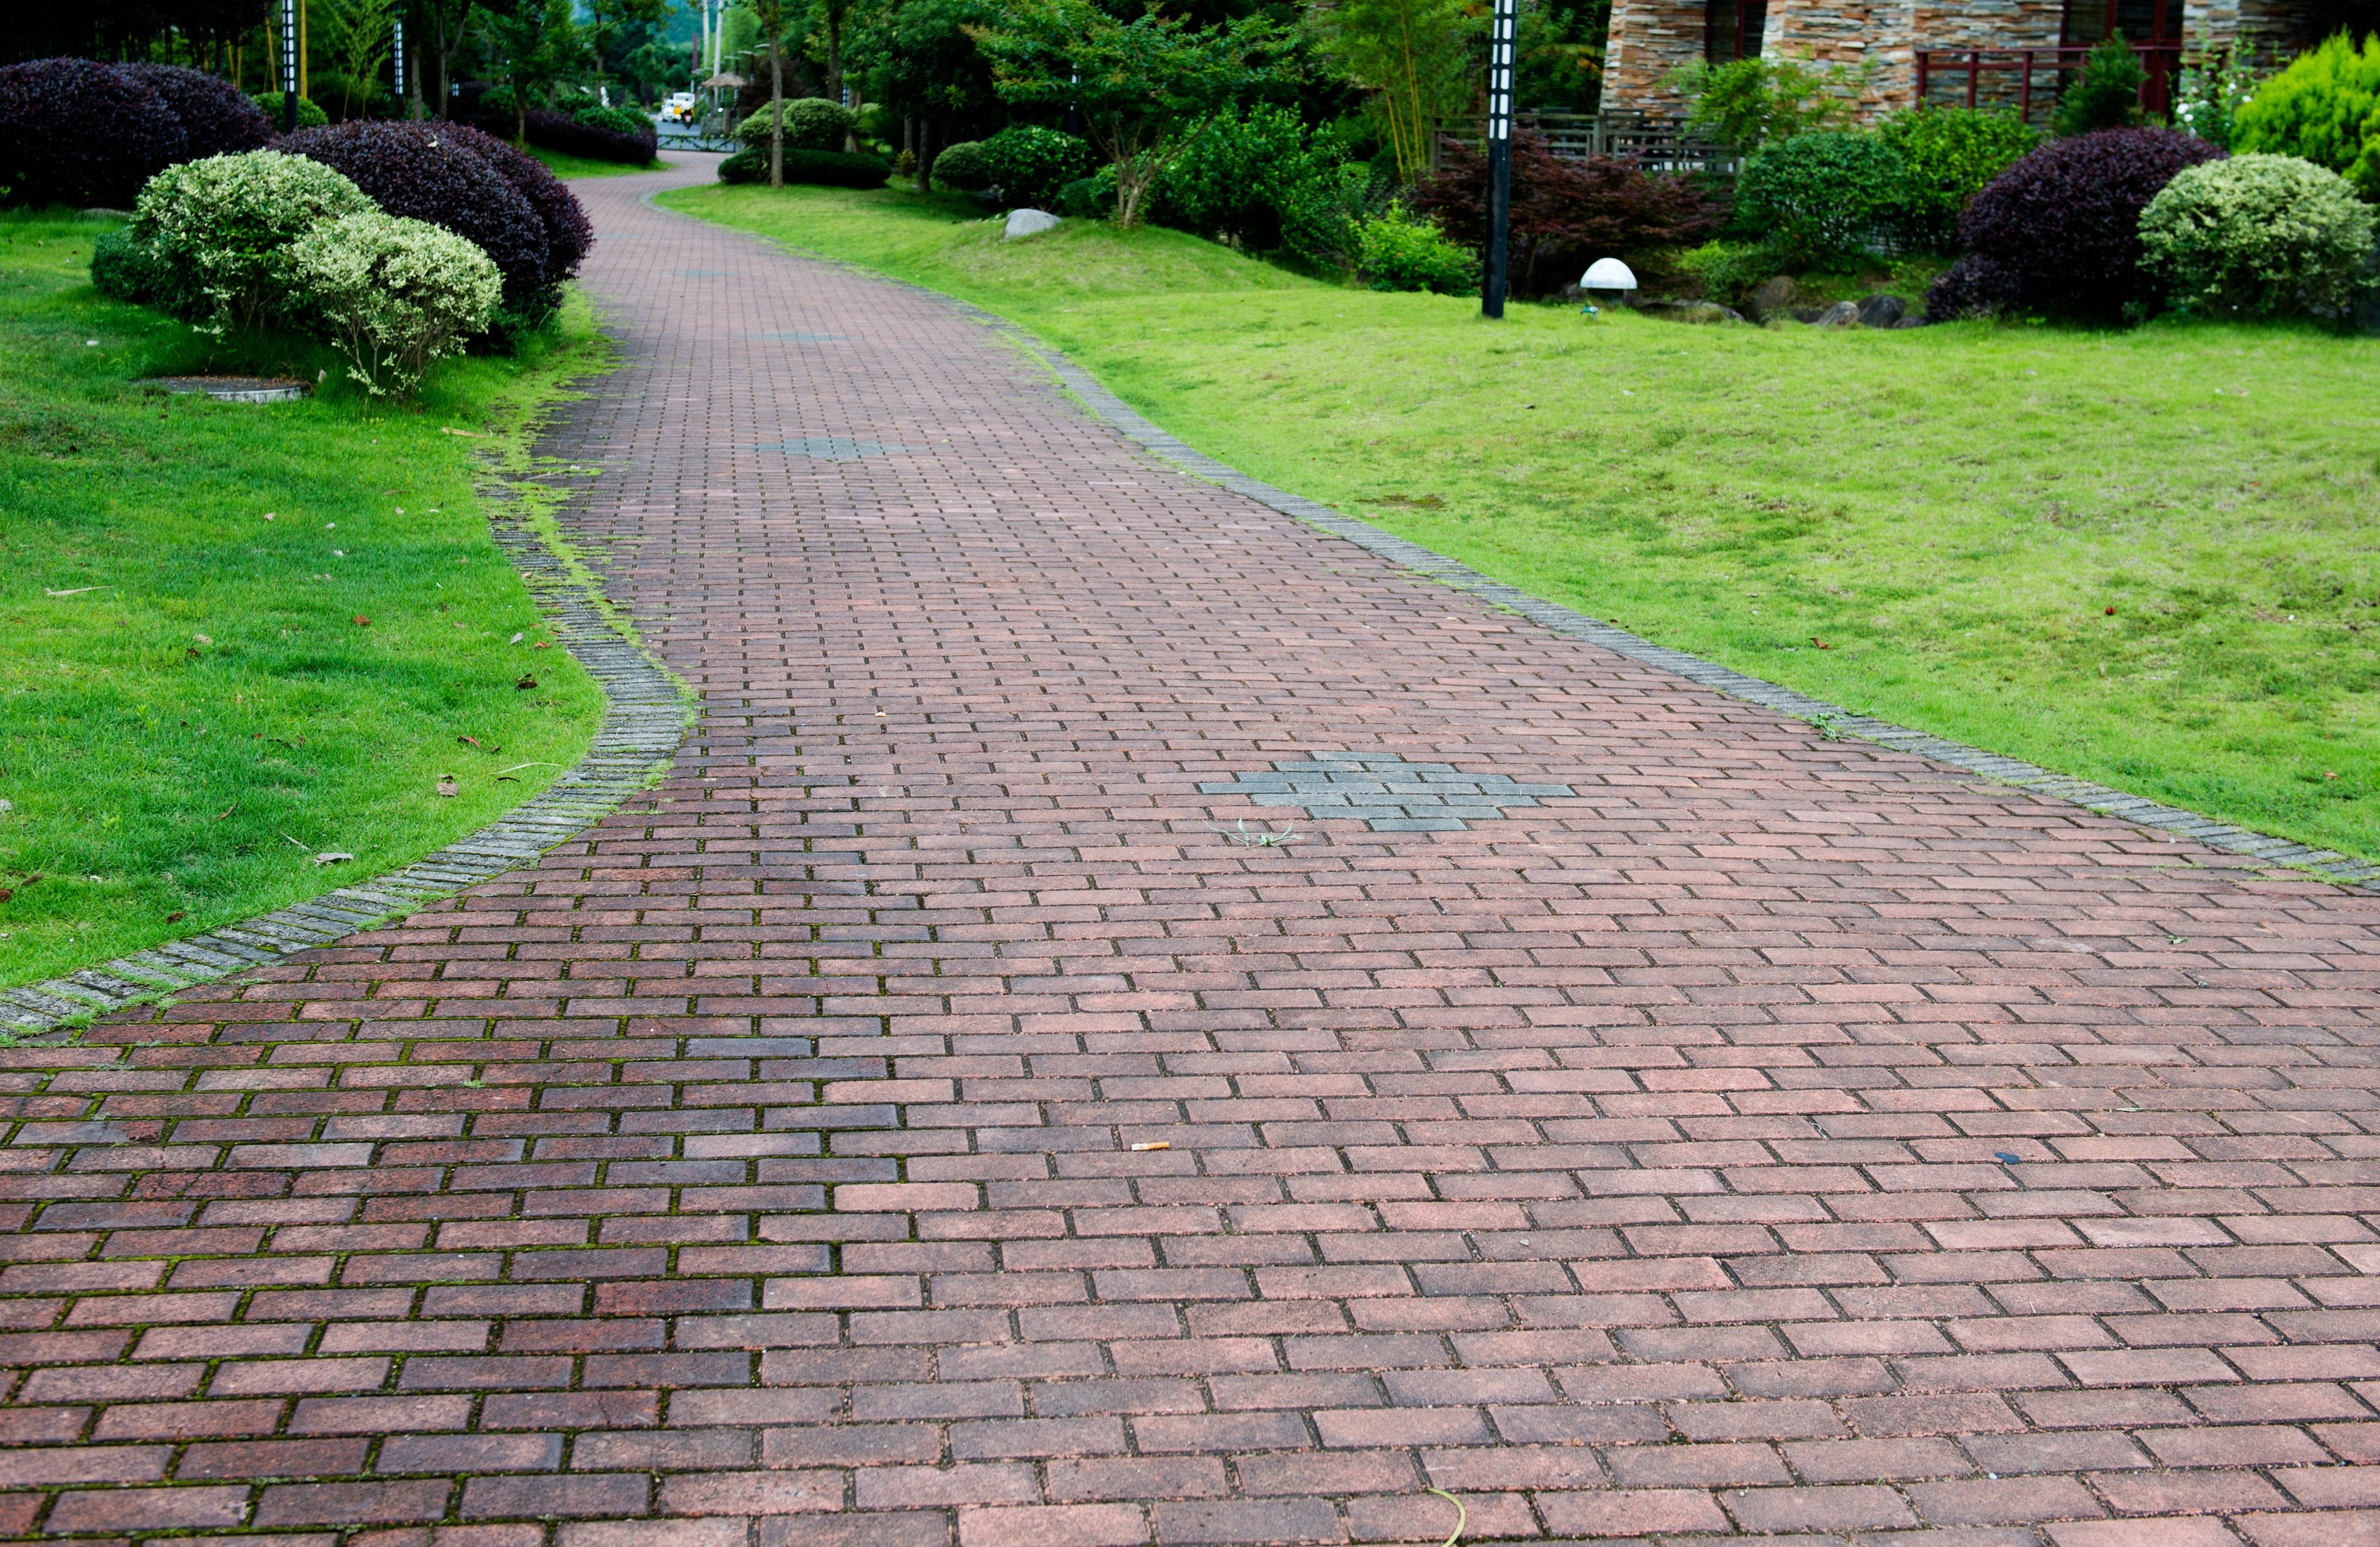
This article will teach you how to create a mold for the elegant basket weave brick pattern paver design. Your friends and neighbors will not believe you created it yourself. Except for the time involved the process is simple and straightforward, too.
Selecting a Pattern

Brick pattern styles. I chosse the Basket Weave for the project.
I decided on a full basket weave design the width of the length of four bricks wide, bordered with running pattern of single bricks as edging.
Preparing the Ground
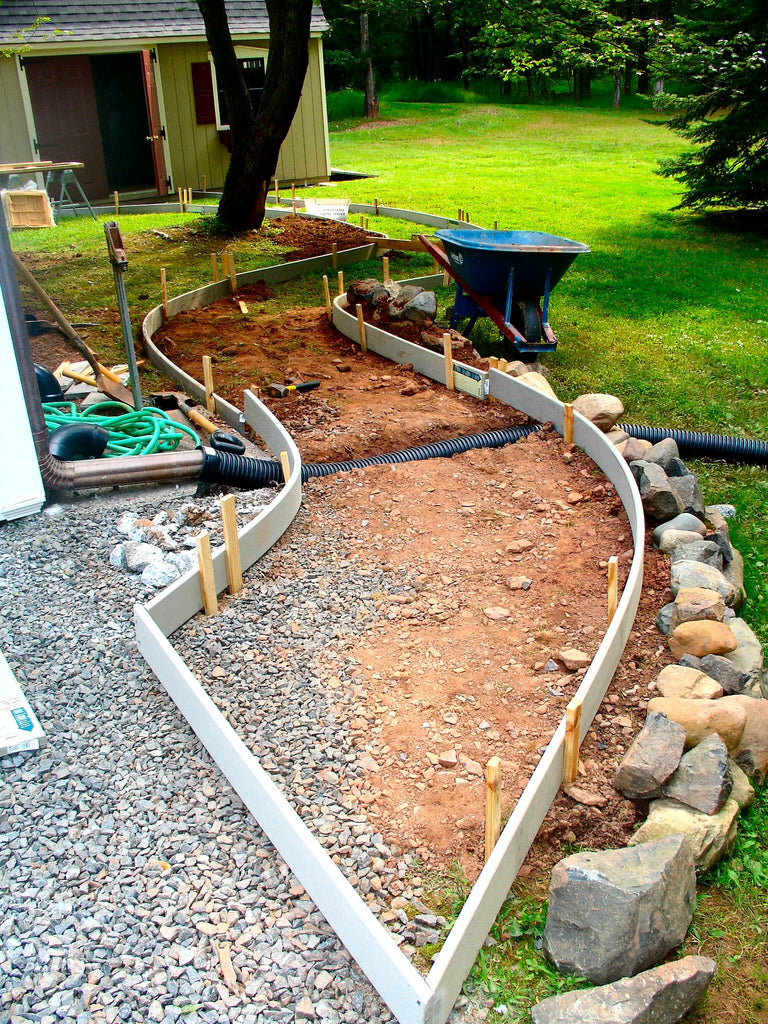
I prepared the groung by digging out abou 4-iches of earth and then setting up the sides.
Making the Mold
STEP 1.
I purchased traditional style brick pavers at Home Depot today. The plan is to make molds of the bricks, then cast them in concrete to duplicate the pattern. Each mold will consists of 8 bricks. I'll make two molds. I calculated that I will need to make 52 sets in concrete, which I'll color the same color as the bricks with concrete by adding concrete powder colorant to the mix.

STEP 2.
I have cut 2 x 4s to surround both sets of bricks spacing the wood 1 1/2 inches from the edge of the brick pattern.

STEP 3.
I then screwed down the wood in such a fashion that each frames a mold. The gap is important as you will see later.

STEP. 4
The bricks were removed for the time being so the wood could be sealed. For this I used latex gloves, a 3-inch chip brush and wood sealer, though varnish would be just as serviceable.

STEP 5.
Once the sealer dried, I then caulked the spaces all around the wood frame using silicone caulk and a caulking gun.

STEP 6.
Wetting my fingers I smoothed out the caulk and removed the excess with a dry rag.

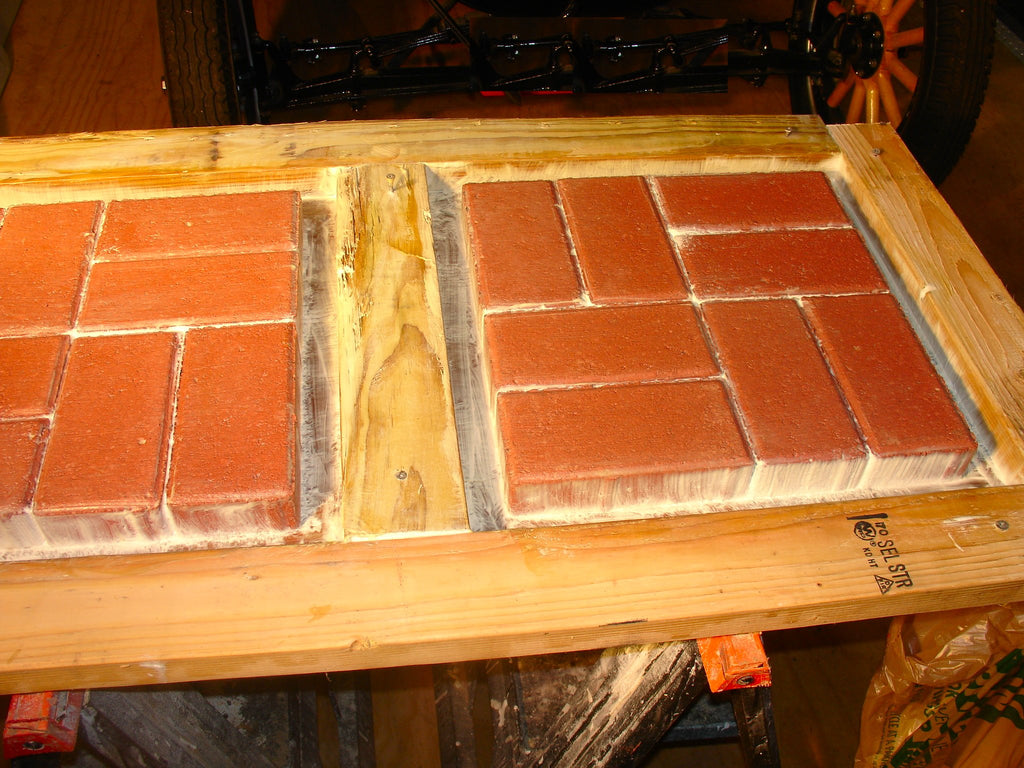
STEP 7.
The bricks are returned to the mold box making certain that they are no closer to the frame than the 1 1/2-inches I measured previously.

STEP 8.
I begin coating the bricks with Kreemtex liquid latex mold rubber. I'm careful to make certain that the latex is worked between the spaces of the bricks. This is important so that a clean separation is achieved once we have cast in concrete.
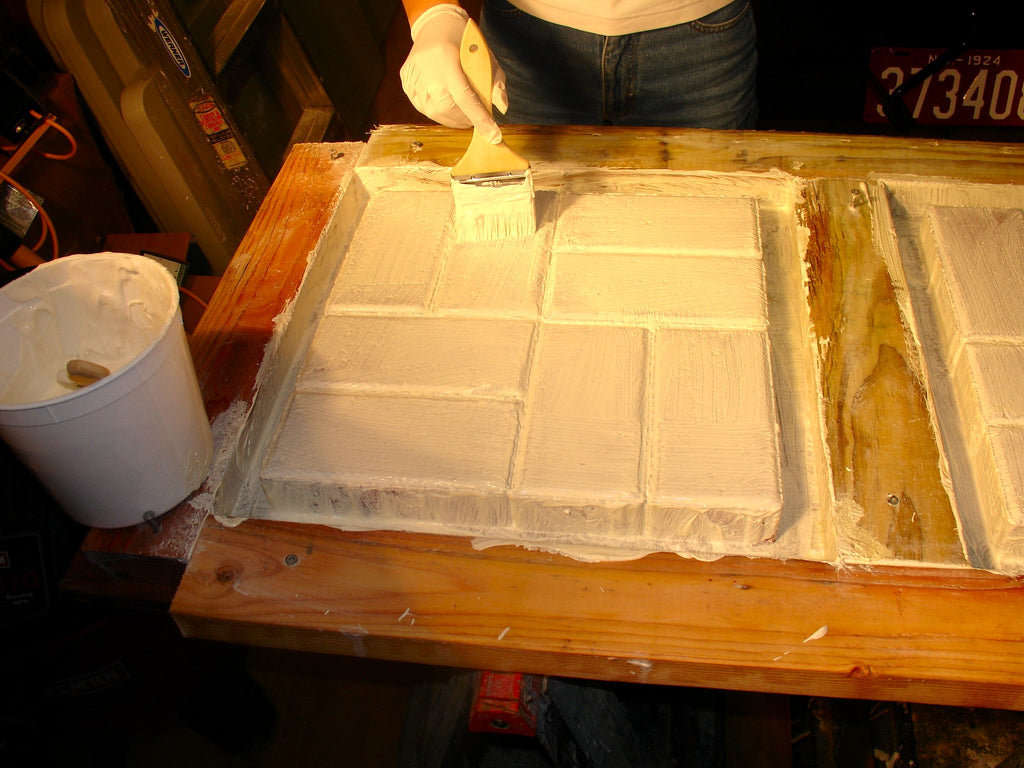
STEP 9.
Not only are the bricks coated with latex, but the gap between the bricks and the frame as well as the side of the frame is also covered. This will result in a rubber flange once we finished our latex coatings. This coat of latex is the first of 14. Allowing about three hours for each coat to dry, building a latex mold will take a number of days. But it is worth it as latex is the best mold material to use when casting in concrete as it does not wear as rapidly as other mold materials do. I checked on the latex to see if it dried, but the damp, rainy weather has left it slow to cure. So that's all this Saturday evening. I'll see if I can get 3-4 more coats on Sunday.
STEP 10.
Overnight the first coat of latex rubber has dried. The bricks absorbed the moisture so it appears that there is no latex there. But on closer inspection there is a very thin coating. I added the second coat at 6:30 this morning - allowing three hours in between to dry I hope to apply on 4-5 more coats today. That's my plan -- we'll see if it works out as there is always some adventure that gets my attention and sends me astray of my goal.
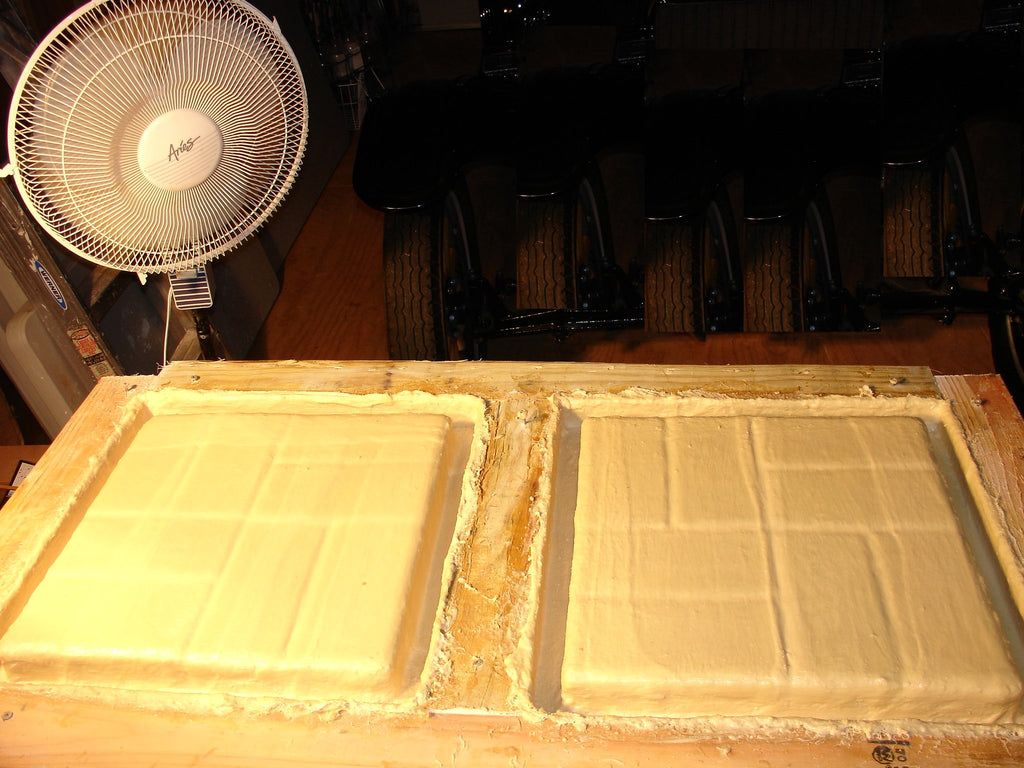
STEP 11.
My plan worked - with the help of a fan blowing across the wet latex I was able to shorten the drying time to about an hour and a half per coat. At this stage there are ten coats applied on the way to fourteen. But now I must add reinforcement to make the latex rip resistance and to triple its life. So now is the time to embed cheese cloth strips. The eleventh layer of Kreemtex latex is brushed on and the cheese cloth strips are cut and laid down on the surface.

STEP 12.
A coat of Kreemtex latex is added on top of the cheesecloth and the next strip of cheese cloth goes down. I must be careful not to leave any air bubbles or separation between the latex surface and the cheese cloth or it will be a weak spot in the final mold. I carefully take my brush to the corners and edges and press out all the air repeating this three or four times. Once the cheese cloth is down and coated with Kreemtex there will be three more layers of latex applied to finish the latex portion of the mold. To be Continued . . .
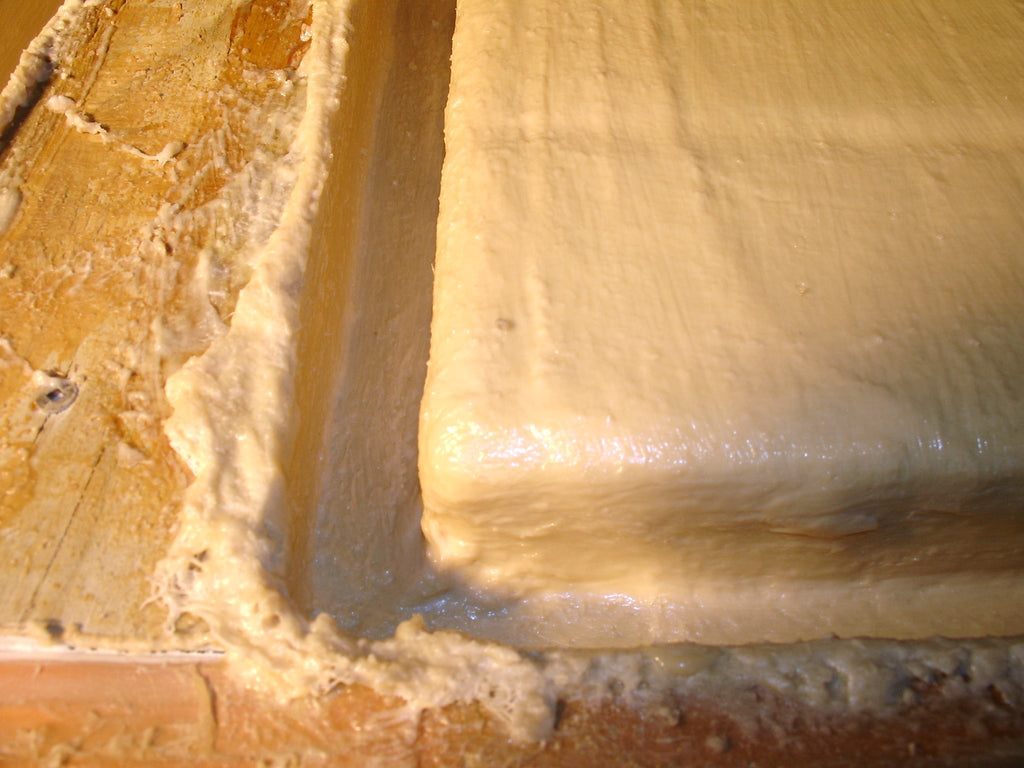
Finally finished the latex mold. There are now 15 coats of Kreemtex applied. The latex is about 1/4-inch thick (see inset). I will begin the next phase tomorrow by adding a rigid support shell mold made of fiberglass. The support shell could be made with CastRite plaster, but it would need to be 3-inches thick. That means it would be very heavy. Since I have to make 52 castings in concrete when the mold is finished, having a lightweight shell mold will make molding easier to handle.

STEP 13
I begin creating the rigid fiberglass support shell by assembling all the material. Polyester resin and its hardener. Wax and PVA mold release. A bubble roller and a squeegee. Rubber gloves, mixing buckets, mixing sticks and a measuring cup. Acetone to soak the squeegee and roller in to keep the clean and resin free. S scissors, box cutters and some rags. I'm also outdoors because the polyester resin odor is too strong to use inside.
STEP 14
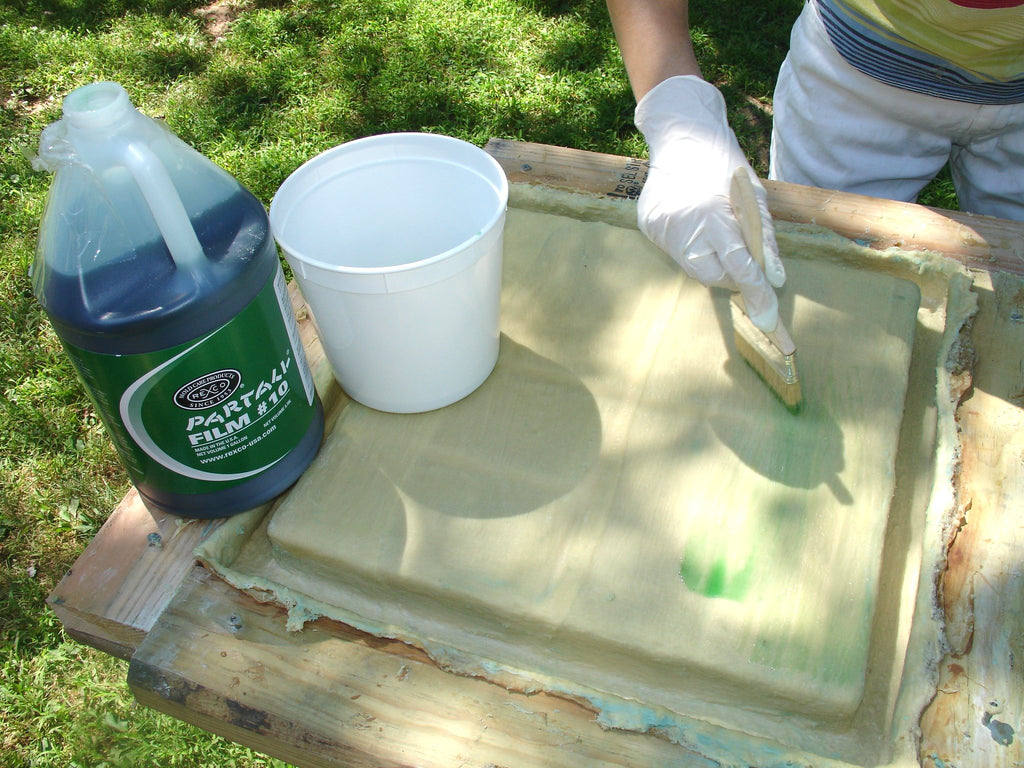
I begin by covering the latex mold thoroughly with a mold release wax.
When the wax is dry I add a second type of mold release which is a liquid. I paint on a coat of PVA release. This needs time to dry.
STEP 15
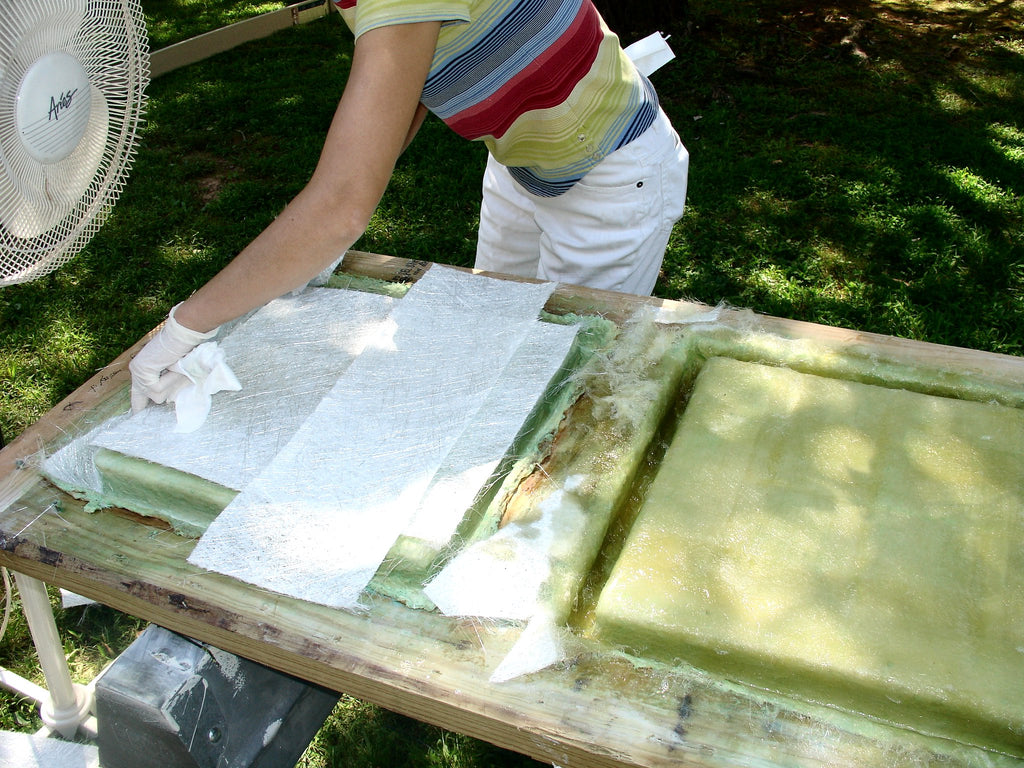
Strips of fiberglass mat are cut to fit the latex mold and laid on top to await for the fiberglass resin. I mix 20-ounce of polyester resin and combine it with 5.5 cc's of the fiberglass hardener and mix until the mixture turns a brownish yellow.

STEP 16
The resin is poured on top of the fiberglass matting. With a squeegee the resin is forced through the matting paver the entire surface. Later I'll use the bubble roller to roll out any air bubbles that remain.
STEP 17
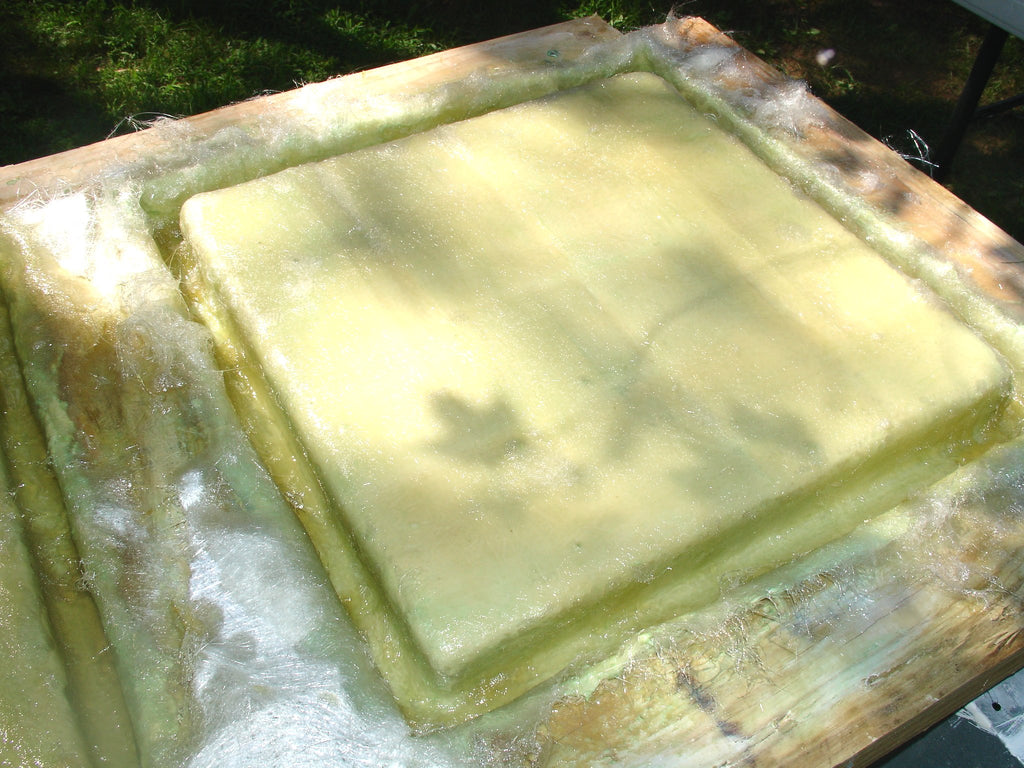
This is the first coat of fiberglass mat and resin, waiting to dry. The resin doesn't completely dry in this step. It remains tacky which helps in the application of the next layer of matting and resin. I'll but on three layers to give the shell mold enough strength to stand up to repeated pouring of concrete.
STEP 18
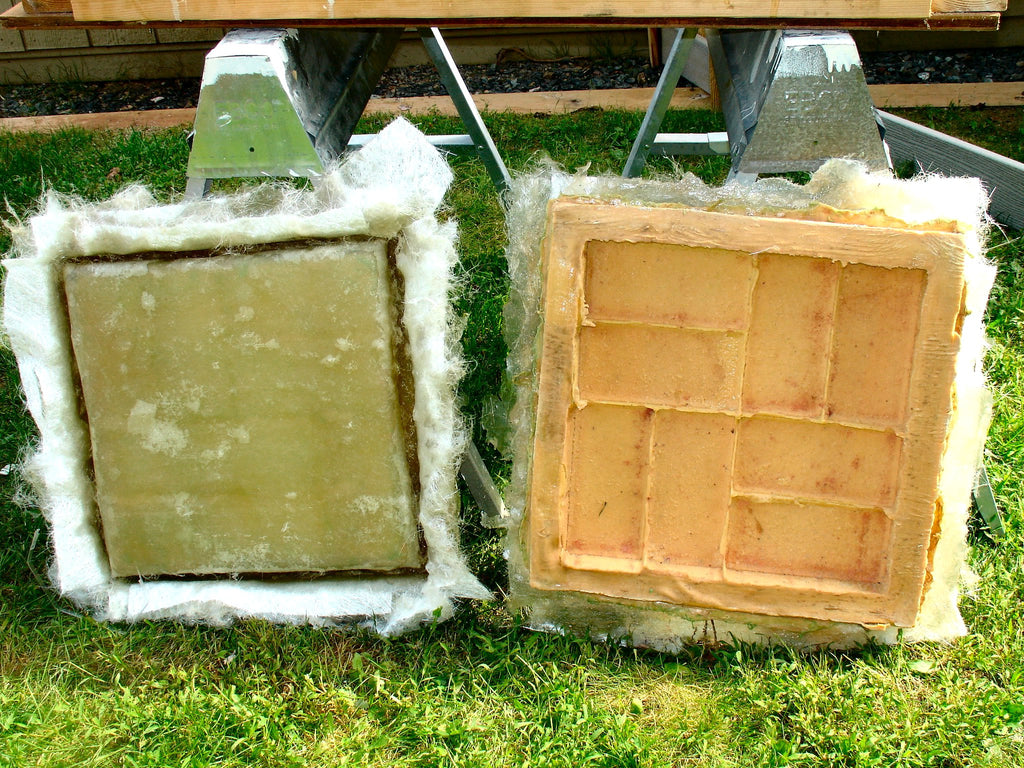
Once the fiberglass was completely dry I de-molded them using a small pry bar that I worked around the edges. The fiberglass shell, came free without difficulty because of the mold release. The photo shows both the latex mold with its brick pattern and the fiberglass shell. I will use a saber saw and trim off the four edges of each mold. These are very sharp and needle-like.
The molds are now ready to receive concrete. But before I pour I will brush in two coats of motor oil which will act as mold release and allow the cure concrete to be easily removed from the mold.
So happy concrete pour and brick laying.