Mold Making Basics - ArtMolds
Since the rubber is flexible and would not hold its shape one removed from the model for casting, a second mold material is added on top of the rubber. This application is called a shell mold or mother mold and consists of a material the sets to a ridged consistency such as gypsum plaster. In that way when the impression mold and the shell mold are removed together from the model, the impression mold can be firmly supported by the shell for casting.
Mold making and model making are trades where the learning never ends. As with any new endeavor, the approach to mold making begins with first learning mold making basics. Which naturally progresses from learning the simplest of mold making techniques such as the single piece block mold, to the much more complex, poured, multi-piece blanket mold. and then building your knowledge and skill level by practicing with intermediary to more advanced mold making techniques. Listed below are the mold types that will be explained in this section in order from least complex to most complex:
The the list to the right shows that the single piece poured block mold is the easiest mold type to create,. Following the order on the list shows that the poured blanket molds are more complex to execute and therefore will take more time to create. But the advantage of a poured blanket mold is that it takes less mold rubber than a block mold. So the trade off is time versus money.
Both mold types, that is a blanket and block mold require some type of ridged containment. Poured blanket molds require construction of a “mold shell” or “mother mold”, while poured block molds require a containment area often referred to as a “mold box”. The construction of mold shells takes practice, while the construction of a box can be rather simple. Blanket molds require less mold rubber to construct, but usually require more time and experience. We begin with an explantion of the various types of blanket molds available to the mold maker, followed by an explantion of the types and uses for block molds.
Mold Construction Links
- Blanket Mold
The “Blanket” Mold
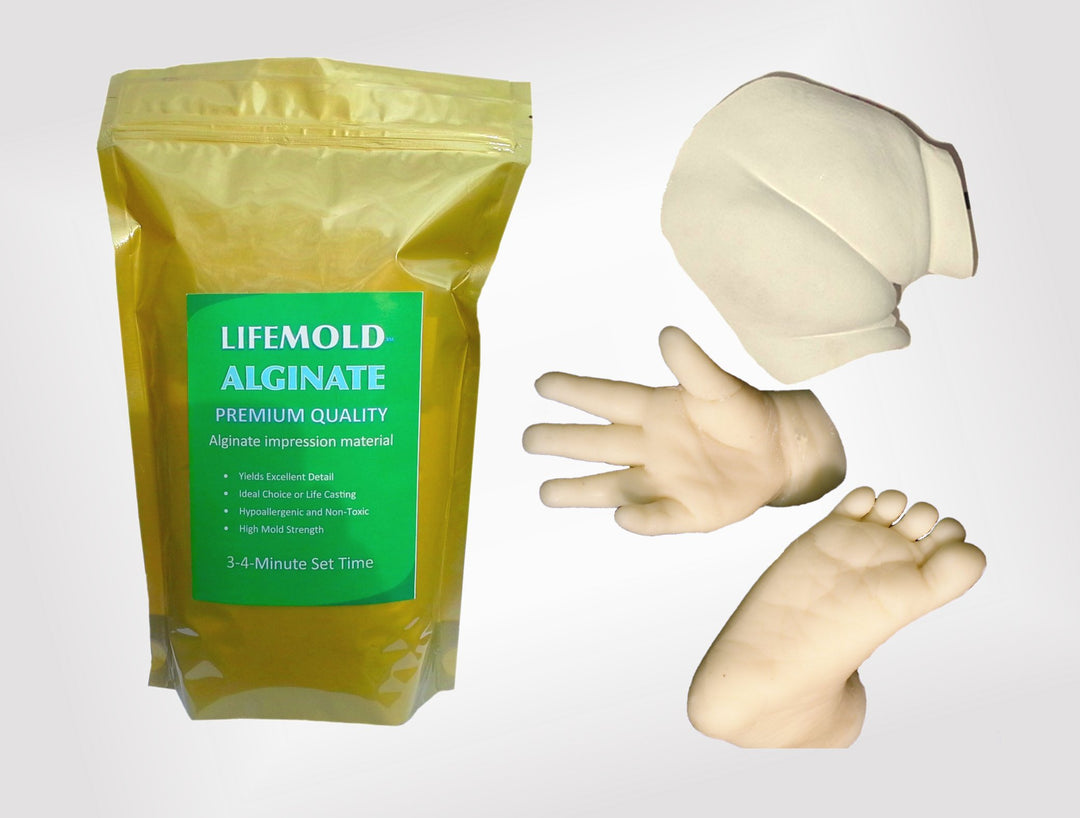
A blanket mold is most often used to reproduce a model such as bas relief where the back of the model is not captured by the mold. As the name implies, a blanket mold is one that lays down a coating of impression material or mold rubber over the entire surface of the model to be reproduced. The rubber is applied to the thickness of about ¼-inch to ½-inch by either brushing, pouring or spraying on the mold material. However, for small to mid-size model the most common application is by brushing. The result is a thin “blanket” covering the entire model.
However, pouring a blanket mold is also an option.But it is the more complicated for beginning mold makers a it requires a number of steps to create a hard shell around the model including spue holes to release air. This will be the subject of a further explanation. For the beginner the brush or spray on approach is the way to go until experience has been gained.

Finished glove or shoe mold being de-molded. An example of cured brush-on blanket mold.
Since the rubber is flexible and would not hold its shape one removed from the model for casting, a second mold material is added on top of the rubber. This application is called a shell mold or mother mold and consists of a material the sets to a ridged consistency such as gypsum plaster. In that way when the impression mold and the shell mold are removed together from the model, the impression mold can be firmly supported by the shell for casting.
Blanket Mold Construction
Glove Mold, or “sock” mold as it is also known, is constructed in one piece. The model is coated with the mold material, often latex mold rubber. It gets its name how the mold is removed from the model in that it is peeled off as one would a pair of gloves or a sock from a foot.This type of mold is best suited for models in low relief. Removal is helped using a silicone release, soapy water or talc powder.
Cut Blanket Mold. This type of mold material is applied as with the glove mold. The difference is instead of peeling it off, one side of the mold is partially slit up the side to aid in its removal. When applying the mold, the mold maker plans on where the slice shall be made so that the area may be built up with a thicker coating of mold material to prevent tearing when the slit is made. The cut is made with a mold knife or key knife in a zigzag (saw tooth) fashion so the edges will register against each other when the model is later removed. This type of mold is used where the entire model needs to be covered and it has low relief and has few undercuts.

Several simple block molds


Two-piece blanket mold with gypsum plaster shell mold. Example of a two-part block mold
Two-piece or Complex Blanket Mold. In this method a mold is made in two or more sections completing each piece before creating the next piece. This type of mold method is used when the entire model requires to be covered, but because of undercuts and high relief a glove or cut mold would be insufficient.
More About the Shell Mold
Shell molds often require a bit more engineering than a blanket mold. That is because under like the material used in blanket molds that is stretchable and flexible, a shell mold is made of a ridged material such as plaster, plaster gauze bandages, fiberglass or specially formulated polyurethane applications. Therefore, a ridged shell must be made in sections so that it can be removed from the blanket mold. These multi-sections are held together with mold straps or bolts, washers and wing nuts. As an example, if you were making a blanket mold of a head in the round, the flexible inner material can fully cover the head. Removal would be made by slicing the rubber up the back of the head and it would come off almost like a mask. The shell on the other hand would be made in two parts – the front half and the rear half. To create the shell a line is drawn from shoulder to should across the top of the head. Each half of the shell is created to align with the line called a parting line. Therefore, before beginning each project care must be taken to plan out how the shell will be created and where the parting line or lines will be made.
An easy and inexpensive way to create a shell mold is with gypsum plaster or plaster gauze bandages.